www.johnnyoptic.com: Replicating the Rodenstock Imagon
DIY Soft Focus
Unless you're a portrait photographer using a large format camera, you may not have ever heard of the Rodenstock Imagon lens.
Although no longer made, this commercial soft-focus lens once had quite a group of loyal users.
The lens acheived its effect through a simple method of controlling spherical aberration.
Anyone who has built or used simple camera lenses, such as those made from a magnifying glass or a single convex element, has
seen the soft look of spherical aberration. Spherical aberration results from the fact that light passing through the center of
an uncorrected lens comes to focus at a different point than light passing though the outer part of the lens. This results in
widening the depth of field, reducing the contrast, and adding a glow around highlights. The amount of spherical aberration is
dependent on aperture. Stopping down the lens reduces the effect.
The Imagon
However, aperture provides very primitive control of the glow surrounding highlights. Stopping down the lens reduces
both the radius and density of the area of glow. The Imagon uses an interesting approach to independently control the
radius and density of the glow. This allows for the very desirable effect of having a moderately sharp image with highlights
that are surrounded by a somewhat wide but very subtle glow.
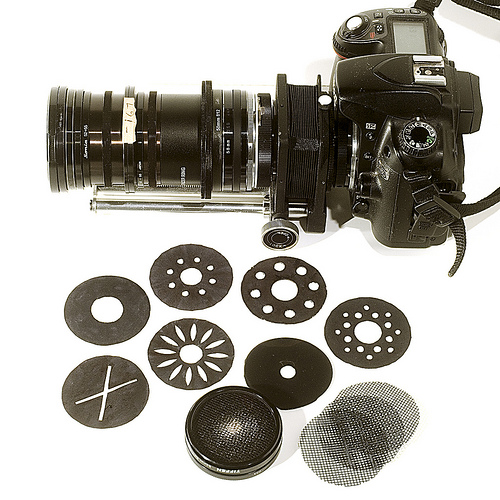
Achieving this result is surprisingly straightforward. Instead of using a standard aperture with a single central opening,
the Imagon combines a simple 2 element achromat with a set of unusual aperture disks. These disks have the usual circular
opening surrounded by two rows of smaller holes. In this way, the majority of the light reaching the focal plane will have
passed though the center of the lens via the large central opening. This causes the image to be moderately sharp. In addition,
a smaller amount of light will have passed though the outer part of the lens via the small outer holes. This allows a small
amount of out of focus light to reach the focal plane and produce a wide subtle glow.
Copyright (2009-2012) John Swierzbin
www.johnnyoptic.com: Replicating the Rodenstock Imagon
Replicating the Imagon
I set out to replicate this lens, not only to demonstrate the principle, but also because I really wanted to add this
capability to my bag of tricks. I decided to use a 75 mm f/ 1.5 achromatic lens from Surplus Shed that I already had
mounted and ready to go. It is mounted in recycled filter rings and has a 52 mm thread which conveniently fits my K2 ring
which attaches to my bellows. The aperture disks fit between the lens and the K2 ring.
However, this simple configuration would not focus to infinity.
So, I added two negative meniscus lenses in front of the 75 mm achromat. This was done to provide enough back
focus so that I can reach infinity focus with this lens on my bellows. This results in a lens with a focal length of
approximately 110 mm and an aperture of about f/ 2 wide open.
The Test
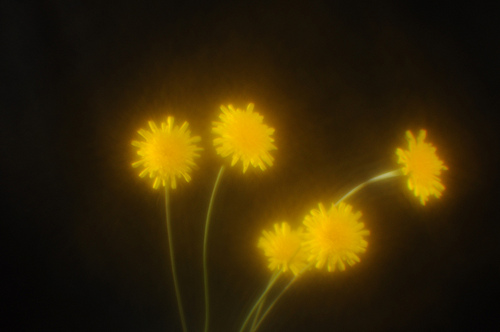
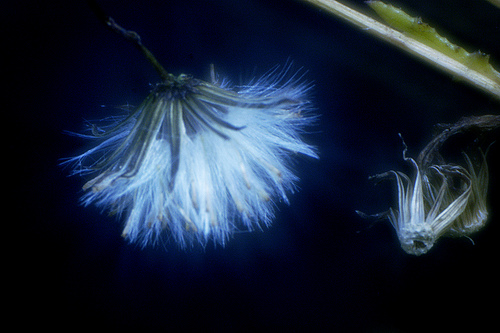
For my test, I chose a very contrasty image shot from a distance of about 1.5 meters.
All the test images are straight out of the camera.
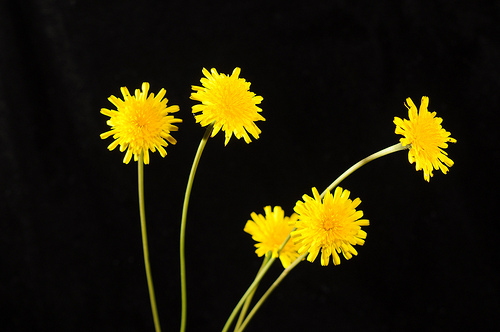
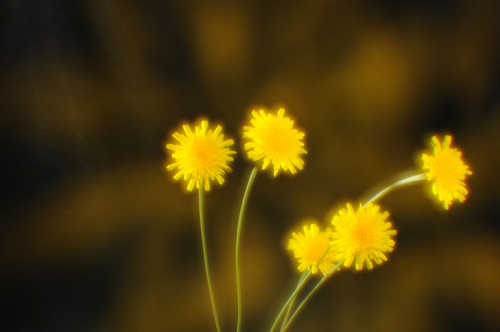
We start with a shot taken with my Nikkor 135/2.8 as a "control."
Copyright (2009-2012) John Swierzbin
www.johnnyoptic.com: Replicating the Rodenstock Imagon
Test Results
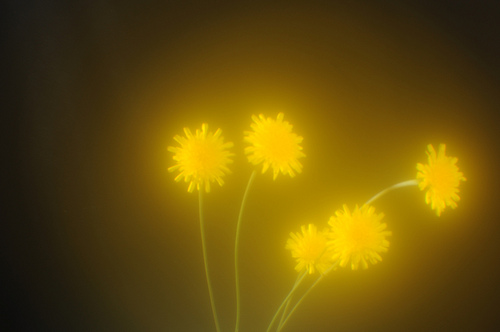
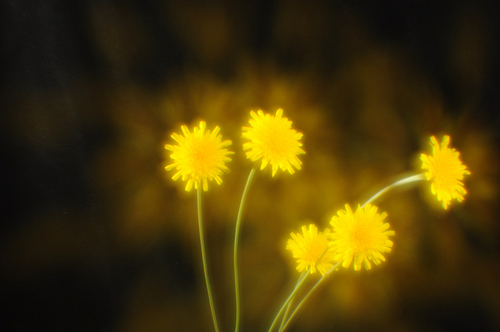
This image was shot wide open (no disk).
Test Results
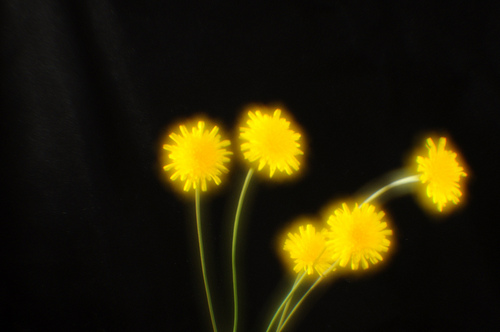
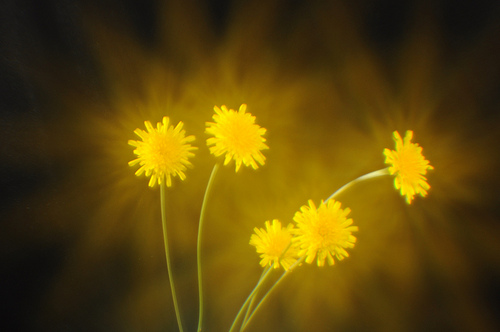
This image was shot with disk #1 (circular aperture approx f/ 5.6).
Copyright (2009-2012) John Swierzbin
www.johnnyoptic.com: Replicating the Rodenstock Imagon
Test Results
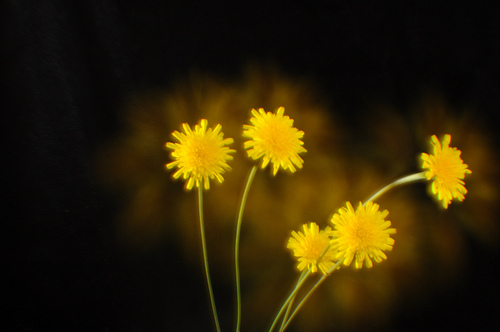
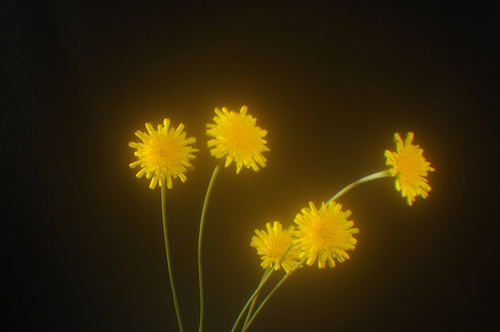
This image right was shot with disk #2 (small row of holes surrounding a central opening).
Test Results
The image on the right was shot with disk #3 (large row of holes surrounding a central opening).
Copyright (2009-2012) John Swierzbin
www.johnnyoptic.com: Replicating the Rodenstock Imagon
Test Results
The image on the right was shot with disk #4 (two rows of holes surrounding a central opening).
Test Results
The image on the right was shot with the "Mr. X" disk (two slits crossing to form an "X").
Copyright (2009-2012) John Swierzbin
www.johnnyoptic.com: Replicating the Rodenstock Imagon
Test Results
The image on the right was shot with the daisy-shaped disk.
Test Results
The image on the right was shot with a one-step apodization filter made from a plastic 2.5 stop ND filter.
Copyright (2009-2012) John Swierzbin
www.johnnyoptic.com: Replicating the Rodenstock Imagon
Test Results
The image on the right was shot with a three-step apodization filter made from nylon bug screen.
Beyond the Imagon
I don't believe that the Imagon's disk is the final word on using apertures to manipulate spherical aberration
My latest soft focus lens uses a homemade apodization filter made from a 120 film negative. To make the filter, I shot an image
with a dark center and gradually lighter exterior. The negative makes a pretty good apodization filter.
Shooting through a negative causes a slight loss of contrast, but that can be corrected with a little processing.
Copyright (2009-2012) John Swierzbin
www.johnnyoptic.com: Replicating the Rodenstock Imagon
Back to Portraits
I started by saying that the Imagon was primarily a portrait lens, so I'll leave you with a portrait shot with my DIY soft focus lens.
Copyright (2009-2012) John Swierzbin