www.johnnyoptic.com: Homemade Lens Primer

The Homemade Lens Primer
Nikon, Canon, Leica, Pentax, Sigma, Tokina, and a host of other lens makers are all striving to bring you the sharpest lenses
with all optical aberrations reduced to the minimum. That's too bad! Because with lenses, as with life, sometimes it's the
imperfections that make things interesting.
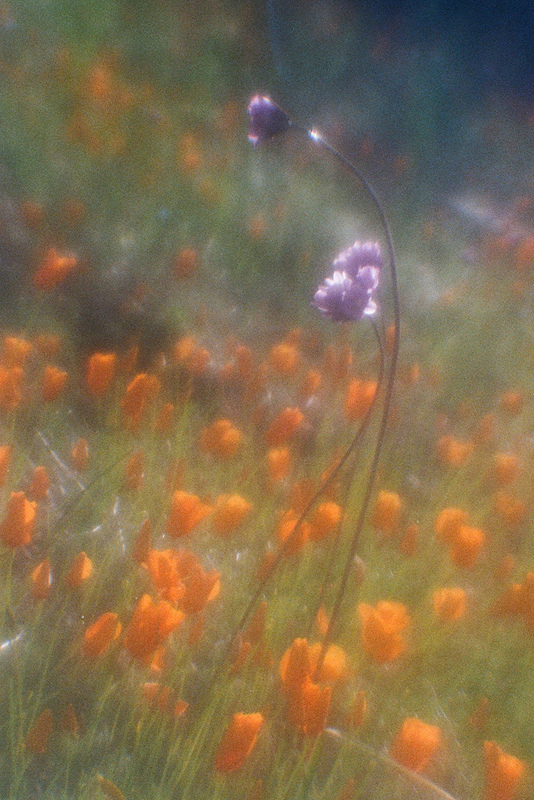
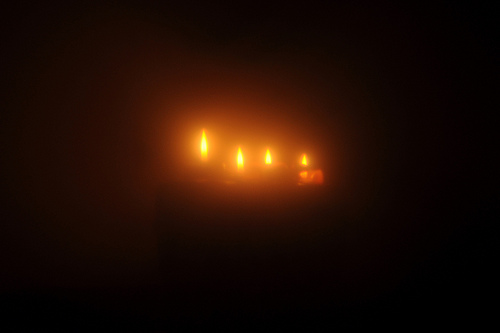
The image on the right was shot with the imperfect optics of a homemade lens. Exploring the soft, dreamy world of DIY camera
lenses in surprisingly easy. Let's get started.
There are two components necessary for a homemade camera lens suitable for use on a SLR or DSLR: the optics (to focus the light)
and the mechanics (to hold the optics in place and hopefully provide a method of adjusting the focus and aperture).
The Optics
Any lens that focuses light (a double convex, plano convex, or positive meniscus) can theoretically be used as a camera lens.
Magnifying glasses, lenses from binoculars, close-up "filters," reading glasses, are all potential camera lenses. A good source for
purchasing lenses is Surplus Shed, where they typically cost $4.00 to $10.00.
Notice that I used the word theoretically above. There are limitations. Every lens has its focal length.
When a lens is used to focus parallel rays of light, the focal length is the distance from the lens to the point of focus.
This means that for a single element camera lens, the focal length determines the distance the lens needs to be from the film or sensor.
This is very important for constructing your lens and it puts some limitations on the lenses that are useful. Assuming you want to
use your lens with a SLR or DSLR, the focal length can be no shorter than about 45 mm because that is the approximate distance from
the lens mount to the film/sensor plane. A lens with focal length shorter than 45 mm would have to be mounted inside the camera to
reach proper focus on distant objects. That's not going to work. At the other extreme, a lens with a focal length of more than about
400 mm starts to get very awkward.
Copyright (2009-2012) John Swierzbin
www.johnnyoptic.com: Homemade Lens Primer
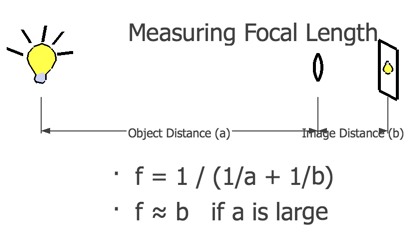
Measuring focal length
Unless you already know the focal length of your lens, you should measure it. You'll need a piece of paper, a ruler, and a distant light source
such as a lamp across the room (do NOT use the sun for this).
Project the light from the lamp through the lens and onto the paper. Adjust the
distance between the lens and the paper until the image is at its sharpest. Now just measure the distance from the lens to the image on the paper.
This is the focal length of the lens, or close to it. Ideally, the light source should be an infinite distance away, but I find that a light across
the room gives me a pretty good approximation. (If you insist on precision, then also measure the distance from the object to the lens and use
the formula shown)
Depending on how we address the mechanics of the lens, focal lengths in the range of 60 - 200 mm are good candidates for DIY camera lenses.
Starting Simple
Let's look at some examples, including different ways to address the mechanics.
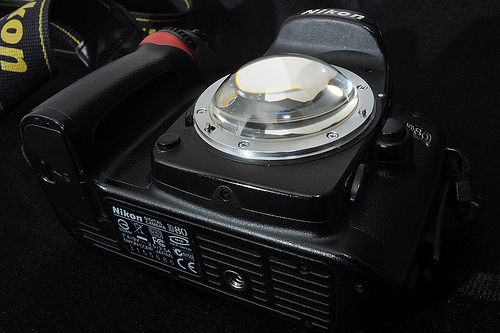
The first lens uses a positive meniscus from Surplus Shed with an advertised focal length of 65 mm and a diameter of 47 mm (price: $6).
As it turned out, Surplus Shed's measurement of the focal length is a bit off. The actual focal length of this lens turns out to be about 45 mm,
so it will not quite focus to infinity. (The flange-to-focal-plane distance of a Nikon is 46.5 mm.) Interestingly, at a diameter of 47 mm,
this lens exactly fits in a Nikon lens mount without falling into the camera. And that's how I use it: by just holding it against the mount
with my fingers as I take the shot. It's not very practical. On the plus side, a 45 mm focal length meant that this lens is theoretically
faster than f/ 1.0.
I call this lens the antipinhole.
Copyright (2009-2012) John Swierzbin
www.johnnyoptic.com: Homemade Lens Primer
First Results: Optical Aberrations
With the lens resting in the lens mount, the focus is fixed at about 10 feet. The images are about a half a stop brighter than my Nikkor
50 mm at f/ 1.4 so I don't think it's quite f/ 1.0 but it is measurably faster than f/ 1.4. But the big surprise is low contrast and very large
halos around any bright objects. And unlike what you might expect from a lens at about f/ 1.2, there is no thin plane of focus that snaps in.
Instead, there seems to be a very broad area from about 7 feet to 14 feet that has nearly the same degree of focus. Of course, the low contrast,
halos, and soft focus can all be put to good use as long as you are not looking for the crisp images produced by commercial lenses.
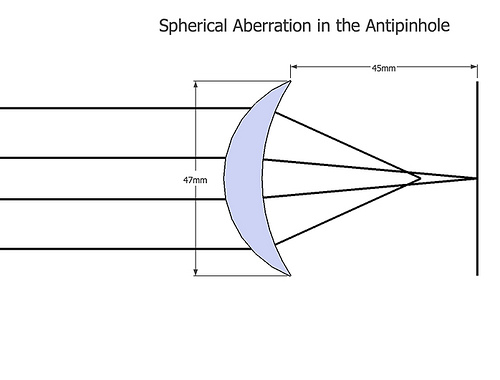
Spherical Aberration
All of the distortions I mentioned can be largely explained by the spherical aberration in this lens.
Parallel rays of light passing through the lens near the center come to focus as expected at the focal length.
However, light rays passing through the lens toward the edge focus at a different distance.
Copyright (2009-2012) John Swierzbin
www.johnnyoptic.com: Homemade Lens Primer
Chromatic Aberration
Spherical aberration is the largest cause of distortion on this lens but it is not the only cause.
Color fringing (noticeable as blue and/or red fringes at high contrast transitions between black and white)
from chromatic aberration is also present, and is caused by the fact that for a lens like this the focal length for short
wavelengths (blue) is different than for long wavelengths (red).
Chromatic aberration can be significantly reduced by using achromatic lenses, which are made by combining a convex lens
made of crown glass with a concave lens made of flint glass. Fortunately, inexpensive achromats are readily available.
Binocular objectives are one source. Another is (you guessed it) Surplus Shed, where they sell a wide range of achromats
including one with a focal length of 75 mm and a diameter of 53.5 mm.
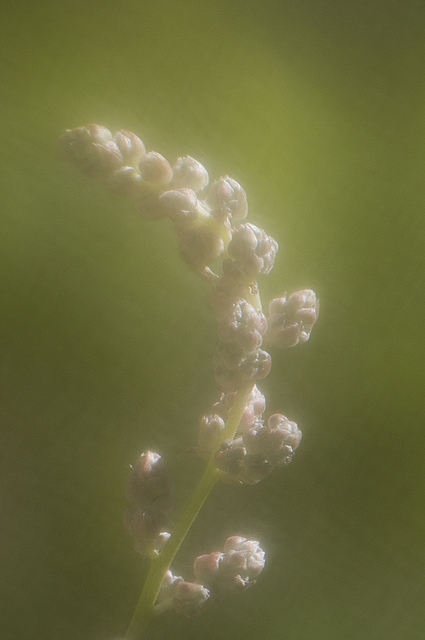
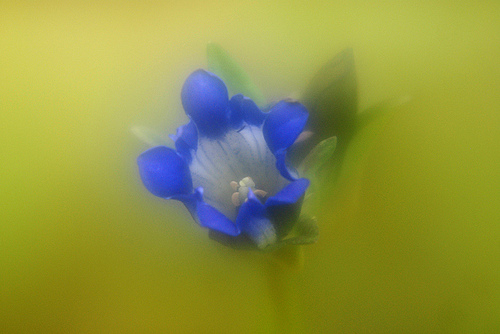
Once again, spherical aberration resulted in soft, "glowing" images.
Mechanics: Connection To The Camera
The mechanics involved in making lenses is often more challenging than the optics. But you have lots of options.
One possibility is to go for a reusable, interchangeable-parts approach.
Old style macro extension tubes, such as a set of Nikon K rings, provides a shortcut.
One side of the K2 ring mounts to the camera and the other side has a thread that fits 52 mm filters.
This 52 mm thread is a convenient standard to use for quickly connecting multiple lenses, spacers, focusers, and
diaphragms into a working lens (and then disassembling it for the next experiment).
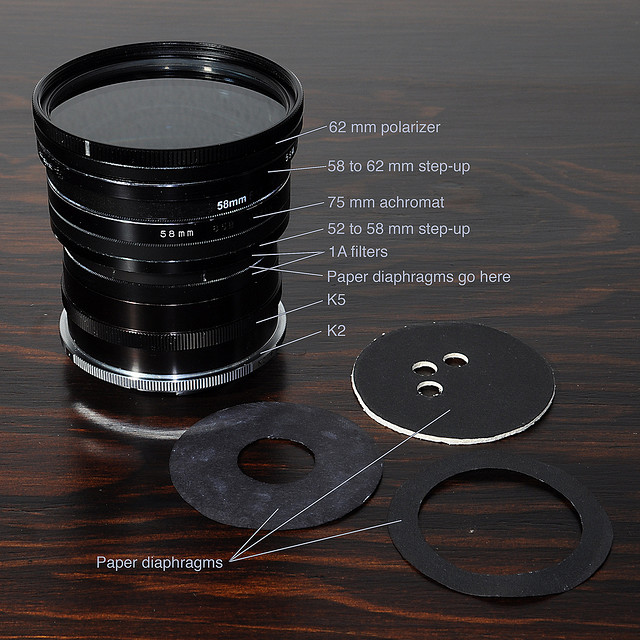
Here is a 75 mm lens along with
some aperture rings. Note that the achromat was friction mounted (thanks to a layer of masking tape) to three 58 mm
rings that were recycled from some junk filters. A 52 to 58 mm step up ring allows this lens to fit my 52 mm standard.
Copyright (2009-2012) John Swierzbin
www.johnnyoptic.com: Homemade Lens Primer
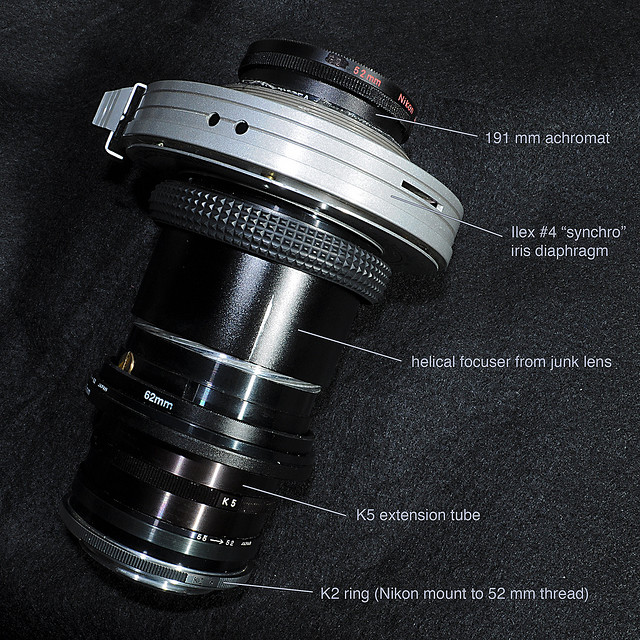
Adjustable Focus
Although functional, the preceding lens still doesn't have a mechanism for adjustable focus. Let's look at a few
approaches to solve that problem.
The first approach is to "recycle" the helical focuser from an old lens. Mounts and
filter threads can be attached with Super Glue if necessary. This lens also includes an old iris diaphragm I found for
$3 at a local surplus shop. Attaching rings from junk filters to both the focuser and the diaphragm will allow you to use
them in an interchangeable system. This lens uses a 191 mm achromat ($9 from SurplusShed).
Adjustable Focus (continued)
Another approach is to use two tubes with slightly different diameters to build a sliding (telescoping) focuser.
Cardboard mailing tubes or PVC pipes are possible sources for the sliding tubes. Sticky-back felt, from your
local arts and crafts store, can be used to create a nice friction fit between the two tubes. Be sure to leave a
lengthwise gap in the felt to allow air to escape as you are focusing. The felt can also be used to line the inside
of the tubes to reduce reflected light inside your lens.
Here's an example that uses this approach for a rather improbable 400 mm lens.
Copyright (2009-2012) John Swierzbin
www.johnnyoptic.com: Homemade Lens Primer
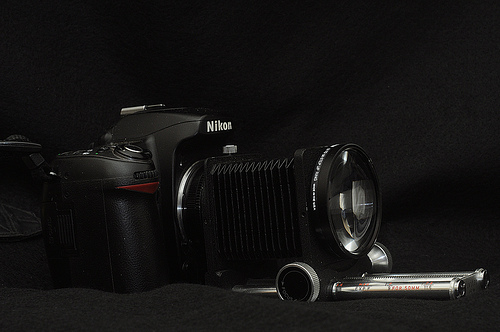
Adjustable Focus (continued)
Macro bellows make ideal focusers for homemade lenses. If you already have bellows, you're in luck.
Otherwise, they are available on internet stores for under $50.
If you're using the "interchangeable parts" system I've described on the previous pages, just plug your bellows in!
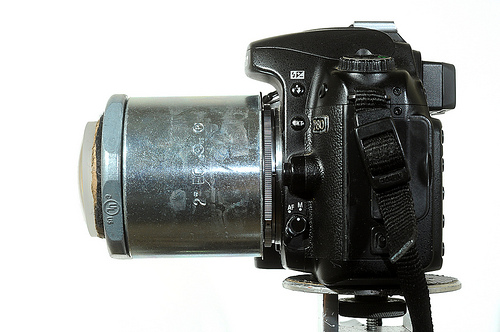
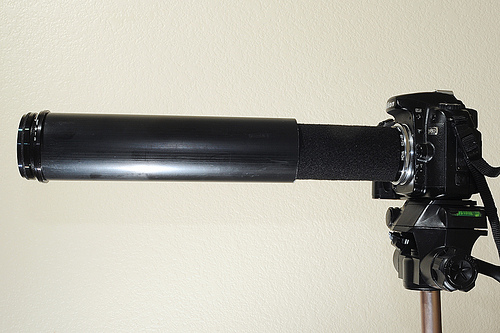
Adjustable Focus (continued)
Of course, you can also find more creative ways to mount your optics, such as using a 2 inch steel electrical conduit
with a screw-in coupler to make a functioning focuser.
This is my serious street photography lens.
The lenses are attached to a tube inside the screw-in coupler,
allowing the lens to focus in the usual way.
Copyright (2009-2012) John Swierzbin
www.johnnyoptic.com: Homemade Lens Primer
The Results
Soft, Misty, Dreamy, Painterly ... you choose the adjective.
Copyright (2009-2012) John Swierzbin